Find What Sparks a Light in You

img_4600-2

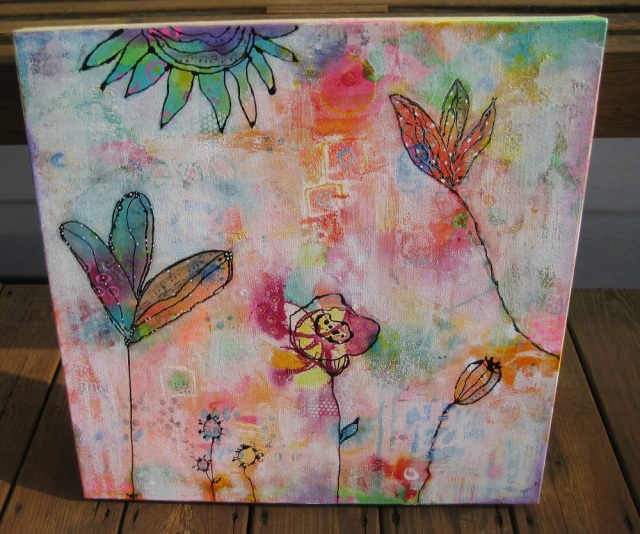
This painting was created based off a lesson in the Layers of Light course I am taking given by Laly Mille.   I love her teaching style and her beautiful light filled art.  If you haven’t taken her class, I would strongly recommend it.  The price is very good and you get so much out of even just one lesson.  She gives six lessons in the course.  So far I have completed two.  Here is the first painting I created from one of the lessons.

I added a few quotes to this painting.  One of them was by Oprah that reads – You have to find what sparks a light in you so that you, in your own way, can illuminate the world.   The inspiration I received from Lally’s lessons definitely sparked a light in me and I hope to create many more light filled paintings.

The flowers at the bottom were created with alcohol inks dropped onto the canvas.  I have never cared for alcohol inks much and very seldom use them.  Laly really likes using them so I thought I would give them another try.  Once I got the first few drops down, I rather liked the way it looked.  You can tell I got a little carried away but it was fun!

I hope you all have found or will soon find what sparks a light in you!

Debbie


Sweet Harmony

Sweet Harmony

Finally finished this painting that I started working on in July of last year.

IMG_2348

Here is how it started and here is the blog post where I wrote about it.  I got stuck on what I wanted to do with it so didn’t do anything for a long time.   I think I was just having a hard time letting go of all that color, as I have done before. Last week I pulled it out of the closet and grabbed some markers and paint pens.  My  granddaughter and I got busy adding some more marks.  I drew in the floral shapes using black india ink in an oiler boiler bottle.  Next I started adding  Golden’s titanium white paint mixed with a little soft gel medium.  I scraped some on with a store card and lightly sponged and brushed some on areas closer to the ink lines.

Sweet Harmony 2Sweet Harmony 3
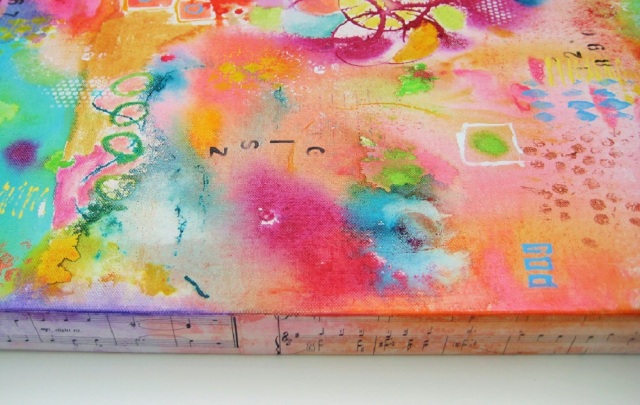
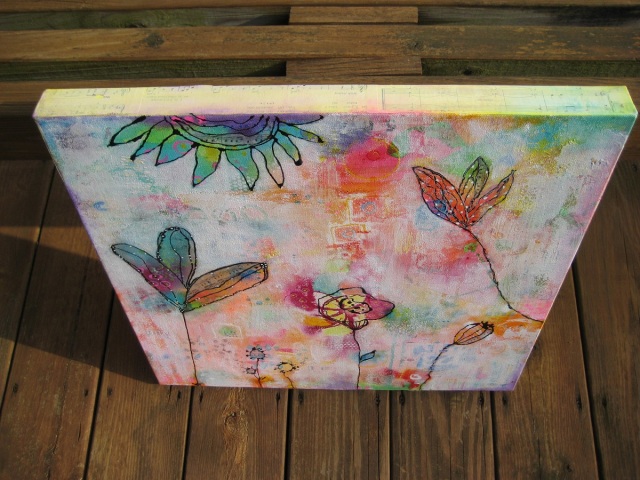
I had previously added vintage music papers to the sides of the canvas and had added various colors of Gelatos on top of the papers.  I decided I wanted the music paper muted a bit more so I went over it with a layer of white gesso and then brought back in some of the color with the Gelatos.  It’s hard to see unless you zoom in, but I added music notes to some sections of the flower shapes by stamping them onto deli paper with permanent ink.  I then layed the deli paper over the section I wanted to collage, traced the outline, cut out the shape and then collaged the pieces onto the canvas.

I’m happy I was finally able to let it go and get this piece finished up!


Bits & Pieces

Bits & Pieces Mixed Media

This is a mixed media painting I recently completed on an 11 x 14 inch canvas.   Last year, I found a wonderful vintage bookkeeping journal at my favorite antique shop.  I couldn’t decide if I wanted to use it as an art journal or use the papers in collage.   I put it aside but found myself leafing through it occasionally.  I love the feel and fragility of vintage paper.  When there is handwriting on it, all the better!  The first page in the journal had this wonderful golden brown tone with a nice sheen to it that I just couldn’t resist using as collage.

For the initial layer, I collaged on some torn pieces from the journal to the canvas and then did some painting and stamping.  Next I collaged on some torn pieces of deli paper from my stash.  The papers were painted with Golden acrylic paints and then covered in interference paint.  This gave the paper a beautiful reflective surface that is just lovely when the light hits it.

Bits & Pieces Mixed Media 2

Next I added some Golden molding paste above and below the collaged deli papers with a palette knife.  I was careful not to completely cover the vintage papers from the first layer.  I made some marks in the molding paste to create texture.  Once the paste dried, I did some more painting with acrylics along with some watercolor crayons and once dry, I added some more molding paste.   After that layer of paste dried, I added more color with acrylics and watercolor crayons.  I finished it off by painting the sides black.

Bookkeeping Journal

Here is a picture of the journal and a piece of the first page.  The pages in the journal are dated from January to March 1910.

Balance Found

I did a post back in March on a painting that did not come out how I had hoped it would.  I finally got around to reworking it and I think I found the balance I was looking for.

IMG_2598

I collaged on papers to cover the circles and squares that I did not like in the original painting.  I then painted on more layers of white fluid acrylic mixed with Golden soft gel matte medium.  Next I added a few more layers of just the soft gel medium over the entire piece.  The soft gel gave it a nice dreamy look almost as if it had been beeswaxed.   It also gave it some nice texture.


IMG_2602

Here is the link to the original blog post  – “Finding Balance – Not”.


Finding Balance – Not

IMG_2053 (2)

This is a collage I had been working off and on for awhile using some of my painted deli papers along with prints made with the gelli plate and some old book pages.  I wanted to get the papers down just so and was really liking the way it was going.  I planned on calling it Finding Balance.  I think I lost all balance though when I added the darker blue circles and squares.   Just not loving this one.  I don’t like the placement of the blue circles or the darker blue square shapes added to the center of the lighter blue.  I had originally planned to have green drips coming down from the collage papers.  I wish I would have stuck with that idea.

IMG_2055IMG_2056

This will probably go in the closet for a while until I come across it again and try reworking it.  I still had fun with the journey of creating it though.

Deli Wrap Techniques

002

I have been experimenting with dry wax deli wrap paper.  I have quite a stash of paper to tear and use in my art pieces.   I’m really enjoying doodling on the wrap with the Faber Castell Big Brush Pens.  I love the way the ink pulls away from the paper and leaves such lovely circles and other doodled shapes.

006

I also like to paint the deli wrap with gesso.  Sometimes I will make marks in the gesso.   This makes for an interesting effect once paint or markers are added.

Deli Wrap 014

Here is a fun way to create mottled looking papers:  Using a piece of deli paper painted with gesso, color on it with a Big Brush Pen.  Let that set for just a few seconds and spray it with water.   Take a paper towel and press it onto the deli paper.  This will pick up some of the marker.  You could also put one color on, let dry, then add another color over the top (such as yellow and orange).  Once you spray with water and pick up the top color with the paper towel and the bottom color will show through.  Try this without using gesso and collaging over other layers of art.  You can see the other layers peeking through.

Deli Wrap 002

Try laying your deli paper over a stencil or other textured object and rubbing with a Caran D’Ache neocolor crayon.

I’m working on a new piece of art using torn deli papers and other papers that my granddaughter and I created using a gelli plate.  I’m wanting to take pics of the process but haven’t been able to get outside pictures with better light because of all the snow we have here.  I don’t ever remember having so much snow on the ground.  We had thunder snow and lighting today with at least 6 inches to add to who knows how many other inches already on the ground.  Hoping for Spring to get here soon!