Waxed Wooden Tag Art

wooden tag

I came across some wooden tags in my stash and decided to paint a girl on one of them  and then coat it in beeswax.  I sketched her in with a graphite pencil, painted her with watercolors and outlined with a Pitt pen.  I used a gel pen for the whites of her eyes and in her hair.

After stamping on some script text at the top of the tag,  I still felt it needed something more.  I added some little jewelry pieces that I had saved from a broken earring to a string and tied it to the tag.

wooden tag 2

Here she is after a few coats of beeswax.  It really deepened the colors. I’m not sure if I like it better with or without the wax.  If I do another,  I’ll make her eyes a lot lighter now that I can see how much they darken up with the wax.  I do like how the wax seems to soften the shading around her forehead and under her eyes making it look more blended.

wooden tag 3

It was hard to get a good image showing the texture created by the wax.  You can see it a little better at the top of this image.

Happy Friday and may you all have a great weekend!

Wax on Watercolor

watercolor & wax pair

Here are 2 of the latest pieces I created using watercolors and wax on 6 x 6″ wood panels.

watercolor

I started out by painting an 11 x 14  sheet of watercolor paper with washes of yellow golds, purples and pinks.  After I determined what sections of the painting I wanted to use, I cut out two pieces of the painting about a quarter inch larger than the panels.

watercolor on panel 2

I used PVA glue to adhere the pieces to the panels and used a brayer to smooth out the paper.  I stacked books on top and let dry overnight.  Once the glue was dry, I trimmed off the excess paper using a craft knife.   I felt that the paintings  looked a bit washed out so I enhanced the color a little by smudging in some metallic Gelatos in purple and gold to a few places on the painting.

IMG_3837

Next I heated the panels with my heat gun and then brushed on a layer of wax, fused and then repeated.  I smoothed out the wax with a little mini iron but there are still some nice little ripples and texture that I love to see when light hits the wax.  While the wax was still slightly warm, I sprinkled on some gold mica flakes and lightly pressed them into the wax.  Once the wax completely cooled, I used the side of my hand to buff.  This gave them a good shine and when the light hits them just right, it looks like glass.

watercolor & wax

Before I added the wax and mica flakes to the two pieces, I decided to do a practice run with the wax and mica flakes.  I had never used the flakes before and wasn’t sure if I wanted them on the paintings.  I had a piece of masonite with mixed media paper adhered to it ready to use as a practice piece.  I quickly painted on some watercolor paints in the same colors used for the panel paintings.   I enhanced with the Gelatos and then added the wax and flakes.  I was really happy with how the practice piece came out!  I’m thinking about putting it in a floating frame.  I love it when you can just let go without any expectations and you end up with something you really like.

More Wax Play

I worked on a few more practice pieces of the watercolor paper on wood substrates.  This time I used some Dr. Ph. Martin’s iridescent inks I recently spotted at Hobby Lobby.  I just love the way the inks shimmer and was so excited to use them that I didn’t give them a good shake first.  Not shaking well resulted in hardly any shimmer to the pieces once the ink absorbed into the paper and dried.  😦   I should have noticed but was also working on another set of paintings at the same time and was more focused on them.

Ink & Wax

I dropped dots of iridescent jade and blue inks onto the paper and, using a foam roller, rolled the ink into the paper.  When those colors dried, I dropped on some iridescent orchid ink and rolled that in.  Next I scribbled on some circles using a metallic grape colored Gelato and scribbled a bit of a lavender Gelato in the center of each circle.  Using my heat gun, I heated the surface of the painting and then brushed on the melted beeswax.  I fused the wax and added another layer and fused again.  I’m not liking how yellow the wax looks on these paintings.  Sometimes the yellow wax gives a nice warm glow to a piece, but not this time.  Next time I’ll use white beeswax on the inks and make sure I shake the bottles well!

Ink & Wax 2

After the wax cooled, I scribbled on some black lines using a calligraphy pen dipped in black india ink and also let some of the ink drop onto the wax.  Once the ink dried, I fused the painting again and painted the sides black.

Wax Play

A few years ago I had bought a bag of wood pieces at Hobby Lobby which had different types and sizes of wood along with some pieces of masonite. I thought these would be good to use for making small beeswax collages and would be nice to practice different techniques on.

I had recently saw a video on Pinterest where the artist glued watercolor paper to wood and let it dry overnight before painting and adding the beeswax layers.  It gives you a nice white background to paint on before applying the wax.    I did this to a number of the wood pieces.

beeswax painting
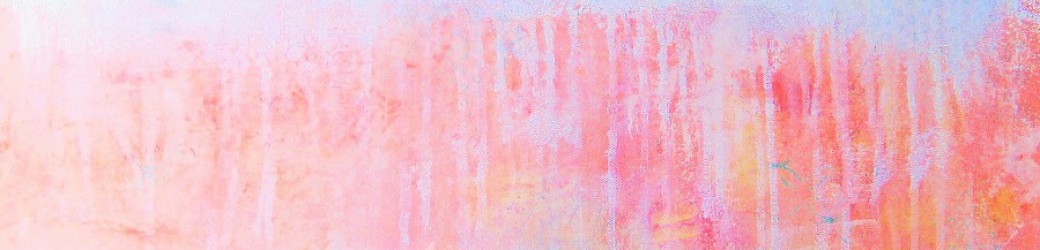
For the piece above, I painted pink and lavender watercolors on the paper background.  I then colored in some shapes and made marks with Neocolor I crayons.  Next I painted on a layer of beeswax and fused it with a heat gun and then repeated with another layer.   I used my craft knife to carve into the wax around the shapes.  I used a black Shiva oil paint stick to color over the lines heavily so that the paint got down into where I had carved.  I used a soft cloth to wipe away the excess black paint but had a really hard time getting it off.  I ended up using a little coconut oil on the cloth to remove a lot of it and then lightly fused the was again.  I think a softer oil stick would work much better.

I didn’t have very good light for taking pictures.  This looks dark because of the lighting and because the oil stick made it pretty grungy looking.  It is 4 x 4 inches.  It was fun little practice piece and I have more wood pieces ready to go when I want to try other techniques.

Happy 2016!


Whimsical Portraits Workshop

Wax Collage

Three months or so ago I took a wonderful workshop given by Ivy Newport.  Ivy creates all kinds of lovely art in the softest of colors.  This workshop actually has two lessons and is called Whimsical Portraits and Dreamy Landscapes.  You can find it by clicking here.  I wasn’t going to post about this until I created the Dreamy Landscape piece but, as usual, I got sidetracked by other things.  I know I’ll create the other piece, but just not when.

In this workshop Ivy shows how to paint over a photo so that it ends up looking very different from the original.   Because I used a photo of my mom, I couldn’t bring myself to change the photo drastically.  So instead, I just added a little color.

I wanted the piece to tell a little story about her.  Mom grew up on a farm in Missouri surrounded by corn fields.  She graduated from school when she was 16 and moved to Chicago with her best friend.  Her sister and brother-in-law owned an apartment building downtown Chicago.  She and her friend got jobs and rented a room in the apartment building.  She told me once about how, on Friday nights, they would walk to the pier and greet the sailors.  Sometimes they would get asked out on a date to see a movie.  The butterfly represents her change from being a small town country girl to moving to the big city.

My dad was from the same small town as my mom.  He was in the Korean war and once he returned home, they married and settled in Central Illinois where the raised me and my sisters.

Dreamy Valentines

IMG_2816

Here are few Valentine collages I created using beeswax as the collage medium.   The wax gives the collages this wonderful dreamy look.  These were done on little 4×4 inch canvases.  I used a blue striped tissue from one of those mini packs that you keep in your purse for the background.  I then added a vintage photo I had printed to fit the canvas, a red ribbon and some buttons.

IMG_2815

This one is similar to another I created last year around Valentines Day.  For the background on this collage, I used scrapbook paper cut to fit the top and the sides.  I really layered on the wax and pressed the key and love tag into the wax while it was still warm.  Once I had the collage how I wanted it, I rubbed some oil pastels around the edges to cover any white where the scrapbook paper did not meet.

If you would like more detailed instructions on how I create the beeswax collages please visit Mixed Media Art.  The link will take you to some Christmas collages I created using paper napkins as the background.   While there, you should go check out all the wonderful information and tips on creating mixed media art.

I hope you have a wonderful Valentines Day!

Beeswax on Wood

IMG_2417

Here’s another beeswax collage I created on a deep cradled wood panel.  It is very similar to a series I did called “Where Dragonflies Dwell”.   You can find that post and how I created the dragonfly collages here.  It’s hard to see in these pictures but I added some Perfect Pearls to the dragonfly wings to make them shimmer.

IMG_2413

IMG_2418


Where Dragonflies Dwell

1 dragonfly

I have to say that making these four pieces was the most fun I have ever had creating art!  So much fun that I plan on making a large one for my entryway.  Yesterday I took a road trip to the Dick Blick outlet store that is about 50 minutes from where I live.  My daughter gave me a gift certificate for Mothers Day and I couldn’t wait to spend it!  I found a wonderful 2′ by 3′ wood panel (exactly what I was looking for) on clearance for $20!  I was so excited that I would have danced across the parking lot with it but it was so big that I had to settle for skipping.  Just kidding.  But I really wanted too. 🙂

2 dragonflys

Anyhow, Where Dragonflies Dwell came about because a lovely piece of art caught my eye on Pinterest here , which lead me to a lovely blog ,which then lead me to purchase this book that is full of wonderful techniques, which then led me to make a mad dash for Lowes to get a bucket of joint compound.

3 dragonflys 2

I spread the joint compound onto the four 6 inch square wood boards and created texture by pressing in rubber stamps, bubble wrap, a round lid and other items that were handy.  I let the compound dry and then sanded around the edges and lightly sanded any spots that looked too rough.  I put a wash of yellow watercolor over each piece and, once dry, I randomly brushed on some soft gel matte medium (this creates a nice resist).  I’m so glad I used yellow as a base color because it gave each piece such a warm glow.  Next I added washes of watercolors and, at times, rubbed some of the color off to reveal the yellow or another color underneath.  Once I had the color how I liked it, I added a bit of text here and there using a rubber stamp and an ink pad.  Next I painted on some melted beeswax.  The wax creates great texture along with giving the paintings a dreamy look.  The dragonflies were printed onto tissue paper and then I lay them on the wax and, using a mini iron, I ironed them into the wax.  They just melted in there so nicely and the tissue paper just sort of disappeared.

2 of 2 dragonfly

I guess I’m going to need some larger objects for creating texture on the next piece, so a gathering  I shall go!

Have a great day!

Debbie

UPDATE:  You can find lots of interesting information about dragonflies and see some beautiful images by visiting thedragonflywoman.com.   I really enjoyed reading about the dragonfly myths.   I also enjoyed reading her post about fireflies.  It made me feel lucky to have grown up where there are lots of them to light up the night.  Thank you Chris, a/k/a the Dragonfly Woman, for allowing me to use your wonderful dragonfly images in my art!

Happy Valentine’s Day!

valentine 6

Valentine’s Day was always my favorite holiday when I was in grade school.   Getting the artsy valentines was fun, but the best part was decorating the shoebox that those pretty valentines would be put into.  I haven’t decorated a shoebox in many years, but I still love to make valentines.

Here’s a little beeswax collage I created on a 4 x 4 inch canvas.  I love the dreamy look that the wax adds to the collage.

valentine 7

If you would like to learn more on how to create a beeswax collage,  I have written a Getting Started with Beeswax guide over at the Mixed Media Art site which you can find here.

I hope your Valentine’s Day is filled with love!  Oh yeah, and chocolates too!

Fun with Beeswax

Beeswax Santa

Things have been a bit crazy around here lately.  I haven’t had much time to post or to create but I did want to share a link to an article I wrote on creating beeswax collages that is up over at Mixed Media Art.  The MMA site has so much information to offer for using various techniques in your mixed media art.  It is one of the first sites I came across when I started doing mixed media and am so happy that I found it.   I have also created a more in depth guide to working with beeswax that will be posted later on the MMA site and will add a link once it is up.

Have a great weekened!